Before we get started, we do need to do a little configuration. More precisely, we need to tell Jenkins about the build tools and JDK versions we will be using for our builds.
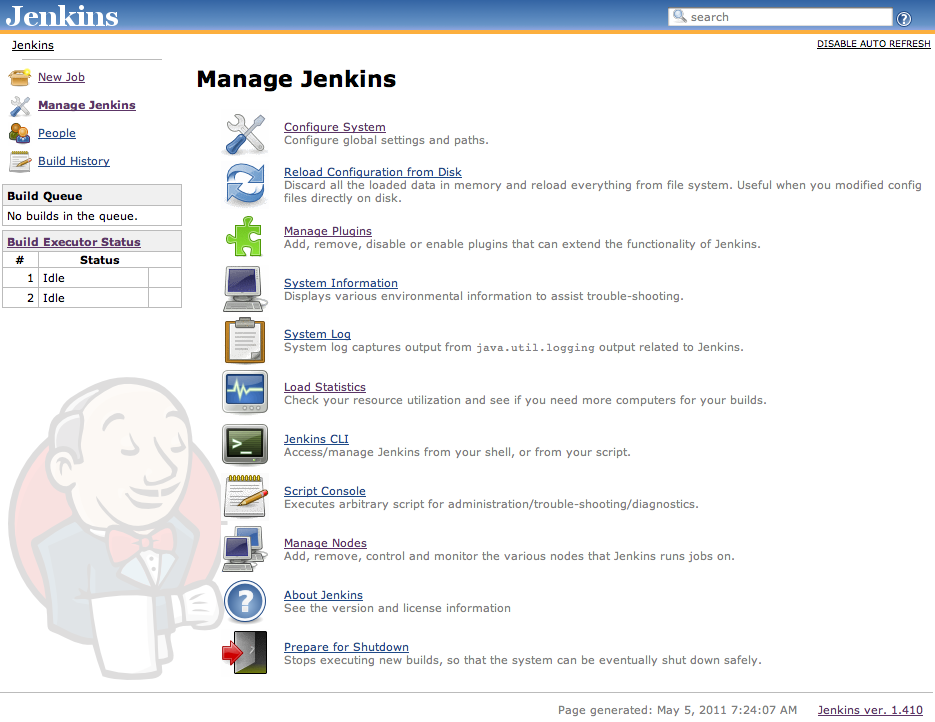
Click on the Manage Jenkins link on the home page (see Figure 2.7, “La page de démarrage Jenkins”). This will take you to the Manage Jenkins page, the central one-stop-shop for all your Jenkins configuration. From this screen, you can configure your Jenkins server, install and upgrade plugins, keep track of system load, manage distributed build servers, and more! For now, however, we’ll keep it simple. Just click on the Configuring System link at the top of the list (see Figure 2.8, “The Manage Jenkins screen”).
This will take you to Jenkins’s main configuration screen (see Figure 2.9, “The Configure Jenkins screen”). From here you can configure everything from security configuration and build tools to email servers, version control systems and integration with third-party software. The screen contains a lot of information, but most of the fields contain sensible default values, so you can safely ignore them for now.
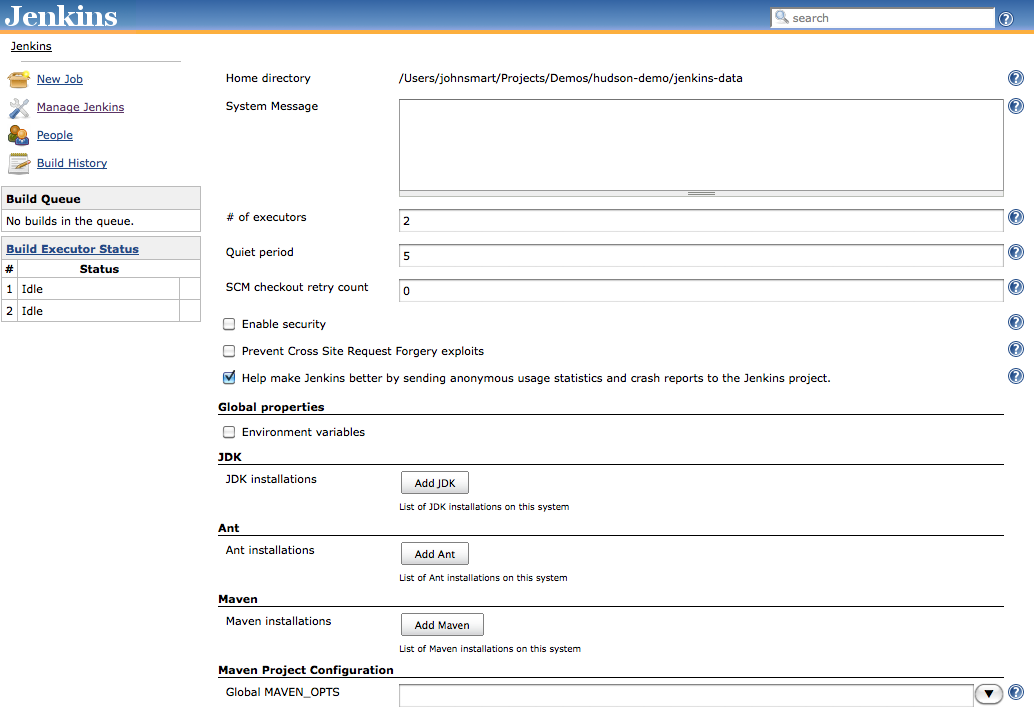
For now, you will just need to configure the tools required to build our sample project. The application we will be building is a Java application, built using Maven. So in this case, all we need to do is to set up a recent JDK and Maven installation.
However before we start, take a look at the little blue question mark icons lined to the right of the screen. These are Jenkins’s contextual help buttons. If you are curious about a particular field, click on the help icon next to it and Jenkins will display a very detailed description about what it is and how it works.
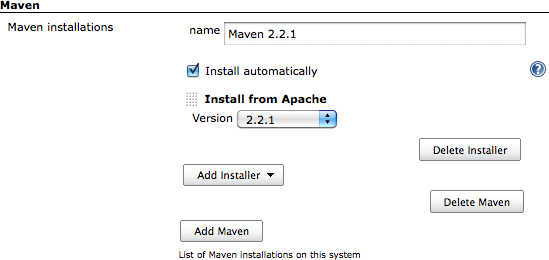
Our sample project uses Maven, so we will need to install and configure Maven first. Jenkins provides great out-of-the-box support for Maven. Scroll down until you reach the Maven section in the Configure System screen (see Figure 2.10, “Configuring a Maven installation”).
Jenkins provides several options when it comes to configuring Maven. If you already have Maven installed on your machine, you can simply provide the path in the MAVEN_HOME field. Alternatively, you can install a Maven distribution by extracting a zip file located in a shared directory, or execute a home-rolled installation script. Or you can let Jenkins do all the hard work and download Maven for you. To choose this option, just tick the Install automatically checkbox. Jenkins will download and install Maven from the Apache website the first time a build job needs it. Just choose the Maven version you want to install and Jenkins will do the rest. You will also need to give a name for your Maven version (imaginatively called “Maven 2.2.1” in the example), so that you can refer to it in your build jobs.
For this to work, you need to have an Internet connection. If you are behind a proxy, you’ll need to provide your proxy information—we discuss how to set this up in Section 4.9, “Configurer un Proxy”.
One of the nice things about the Jenkins Maven installation process is how well it works with remote build agents. Later on in the book, we’ll see how Jenkins can also run builds on remote build servers. You can define a standard way of installing Maven for all of your build servers (downloading from the Internet, unzipping a distribution bundle on a shared server, etc.)—all of these options will work when you add a new remote build agent or set up a new build server using this Jenkins configuration.
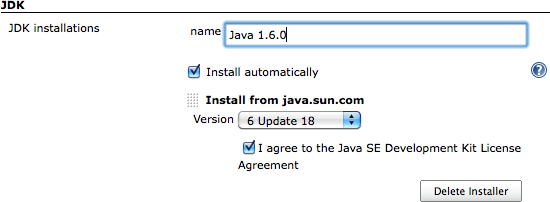
Once you have configured your Maven installation, you will also need to configure a JDK installation (see Figure 2.11, “Configuring a JDK installation”). Again, if you have a Java JDK (as opposed to a Java Runtime Environment—the JDK contains extra development tools such as the Java compiler) already installed on your workstation, you can simply provide the path to your JDK in the JAVA_HOME field. Otherwise, you can ask Jenkins to download the JDK from the Oracle website the first time a build job requires it. This is similar to the automatic Maven installation feature—just pick the JDK version you need and Jenkins will take care of all the logistics. However, for licensing reasons, you will also need to tick a checkbox to indicate that you agree with the Java SDK License Agreement.
Now go to the bottom of the screen and click on the Save button.
Another important aspect you would typically set up is notification. When a Jenkins build breaks, and when it works again, it can send out email messages to the team to spread the word. Using plugins, you can also get it to send instant messages or SMS messages, post entries on Twitter, or get people notified in a few other ways. It all depends on what works best for your organizational culture. Email notification is easy enough to set up if you know your local SMTP server address—just provide this value in the Email Notification section towards the bottom of the main configuration page. However, to keep things simple, we’re not going to worry about notifications just yet.
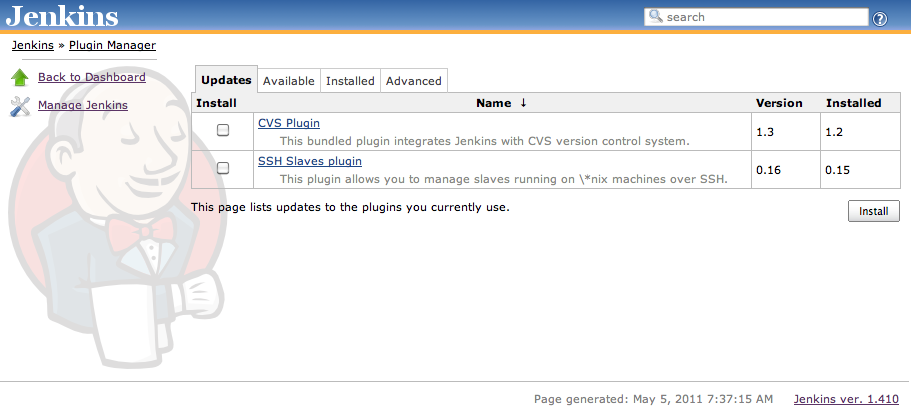
The last thing we need to configure for this demo is to get Jenkins working with Git. Jenkins comes with support for Subversion and CVS out of the box, but you will need to install the Jenkins Git plugin to be able to complete the rest of this tutorial. Don’t worry, the process is pretty simple. First of all, click on the Manage Jenkins link to the left of the screen to go back to the main configuration screen (see Figure 2.8, “The Manage Jenkins screen”). Then click on Manage Plugins. This will open the plugin configuration screen, which is where you manage the extra features you want to install on your Jenkins server. You should see four tabs: Updates, Available, Installed, and Advanced (see Figure 2.12, “Managing plugins in Jenkins”).
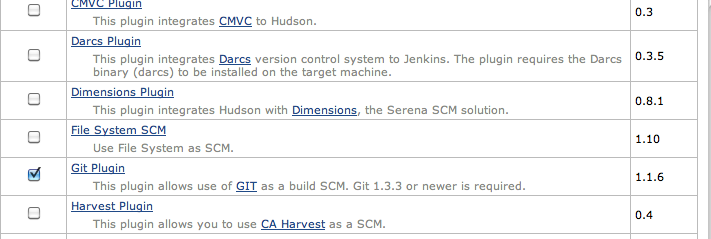
For now, just click on the Available tab. Here you will see a very long list of available plugins. Find the Git Plugin entry in this list and tick the corresponding checkbox (see Figure 2.13, “Installing the Git plugin”), and then scroll down to the bottom of the screen and click on Install. This will download and install the Jenkins Git plugin into your local Jenkins instance.
Once it is done, you will need to restart Jenkins for the changes to take effect. To do this, you can simply click on the “Restart Jenkins when no jobs are running” button displayed on the installation screen, or alternatively shut down and restart Jenkins by hand.
That is all we need to configure at this stage. You are now ready to set up your first Jenkins build job!